Ein korrekt eingebauter Kindersitz ist entscheidend für die Sicherheit deines Kindes – besonders bei einem Unfall oder plötzlichem Bremsen. Diese Anleitung zeigt dir Schritt für Schritt, wie du deinen Axkid Kindersitz mit manuellen Spanngurten (Minikid 4 Pro / Movekid) sicher installierst – je nach Fahrzeugtyp und gewünschter Sitzposition.
Wenn du einen Minikid 4 Max oder Minikid 4 verwendest, findest du hier die passende Einbauanleitung.
Was sind manuelle Spanngurte?
Manuelle Spanngurte erhöhen die Stabilität des Kindersitzes, indem sie eine feste Verbindung mit dem Fahrzeug schaffen. Die Gurte werden beim Einbau von Hand gespannt und mit einem Metallclip an der Rückseite des Kindersitzes eingehängt. Sie können direkt am Fahrzeug befestigt werden – zum Beispiel an der Sitzschiene, am Scharnier oder um einen festen Verankerungspunkt. Bei einem plötzlichen Bremsmanöver oder einem Aufprall verhindern sie übermäßige Bewegungen und reduzieren die auf Kopf und Nacken wirkenden Kräfte. So bleibt der Sitz sicher an Ort und Stelle – und dein Kind besser geschützt.
So installierst du deinen Kindersitz mit manuellen Spanngurten
Befestigungspunkt wählen: Suche einen geeigneten Befestigungspunkt im Fahrzeug – zum Beispiel an der Sitzschiene, am Scharnier des Vordersitzes oder um eine feste Schraube. Wenn der Abstand zum Kindersitz zu groß ist, kannst du einen Haltegurt als Verlängerung nutzen. Siehe hierfür die Anleitung Haltegurte montieren
Gurtverlauf planen: Achte darauf, dass der manuelle Spanngurt ohne Verdrehung verläuft und lang genug ist, um bis zur Gurtaufnahme an der Rückseite des Kindersitzes zu reichen.
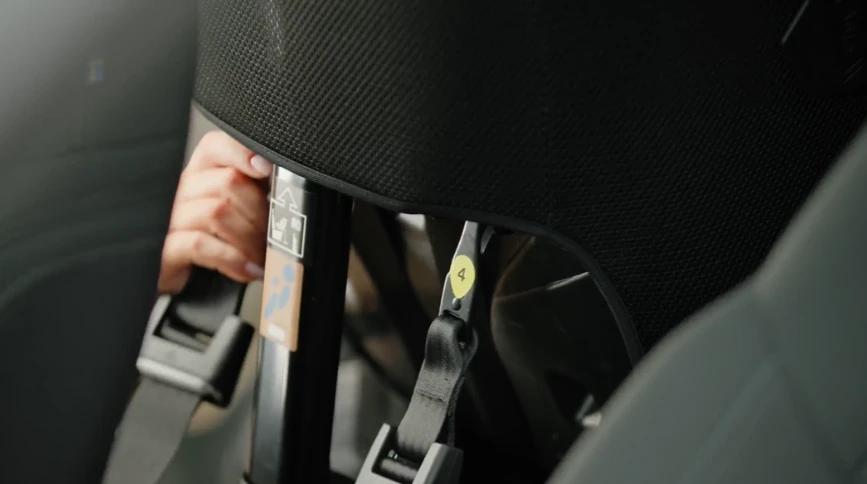
Spanngurte befestigen: Führe den Gurt um die gewählte Befestigungsstelle oder durch den Haltegurt und hake den Metallclip an der Rückseite des Kindersitzes ein.
Sitz fixieren: Drücke den Kindersitz nach unten und ziehe den Gurt so straff wie möglich – der Sitz darf sich kaum noch bewegen.
Je nach Einbauposition und Fahrzeugtyp gibt es verschiedene Möglichkeiten, die manuellen Spanngurte direkt im Fahrzeug zu befestigen. Wähle die Methode, die zu deiner Einbausituation passt:
Einbau auf dem Rücksitz
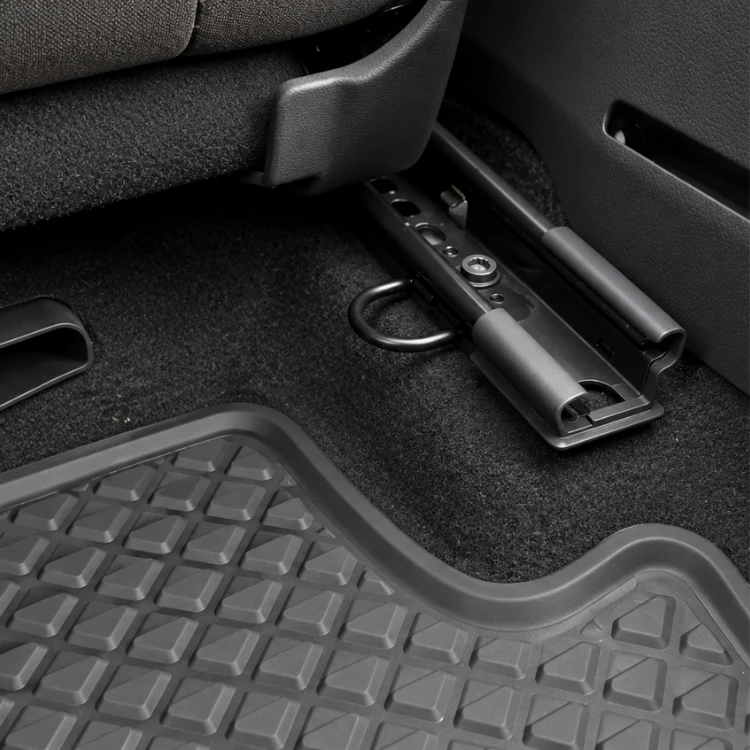
Befestigung der Spanngurte an der Sitzschiene:
Thread the lower tether strap through the pre-installed attachment loop at the base of the vehicle’s seat rail.
Guide the metal clip through the slot on the end of the strap and pull the tether up towards the back of the car seat.
Secure the metal clip to the tether connector on the back of the car seat and tighten the strap to ensure stability.
*Important Notice: Do not move the front seat backwards after installation, as this might loosen the lower tethers, compromising security.
Befestigung der Spanngurte unter der Sitzschiene
Push the lower tether through the gap between the seat’s backrest and the seat cushion.
Wrap the metal clip around the hinge of the front seat and extend it to the backseat.
Thread the metal clip through the strap slot, pull the metal clip up towards the metal clip connectors on the back of the car seat, and attach it securely. Pull the loose end down to tighten it. The car seat installation is now complete.
*Important Notice: Do not move the front seat backwards after installation, as this might loosen the lower tethers, compromising security.
Befestigung der Spanngurte an vorhandenen Verankerungspunkten
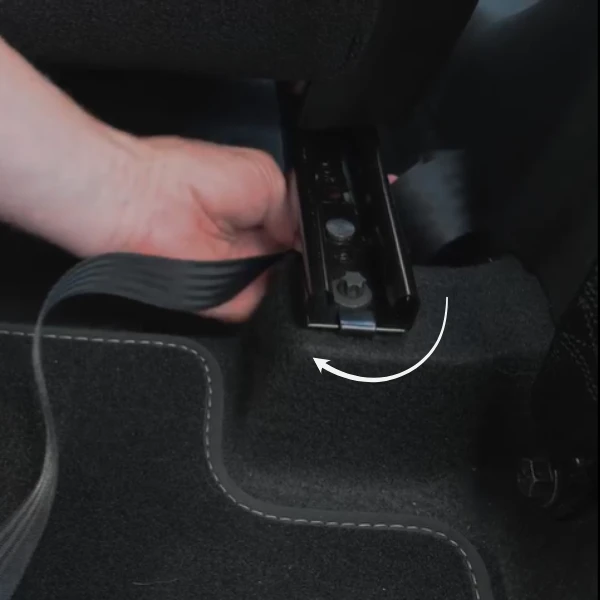
Wrap the lower tether between the vehicle’s seat rail and the floor.
Thread the metal clip through the strap.
Pull the metal clip up towards the metal clip connectors on the back of the car seat and fasten the metal clip securely. Tighten the strap by pulling the loose end of the strap down, removing any slack.
**Important notice: Do not move the seat position after fastening the straps. This could damage the lower tethers.
Befestigung der Spanngurte am Vordersitz
Wrap both ends of the lower tethers underneath the seat rail by pushing the strap around the seat rails connecting point of the floor. Make sure to position the strap beneath the seat rail and loop it around the bolt or screw that anchors the rail to the floor, avoiding wrapping it over the top of the rail.
Thread the metal clip of the strap through the slot on the strap.
Fasten the metal clip to the back of the car seat connectors. Tighten the lower tether by pulling it down, securing the car seat.
***Important Notice: Do not move the vehicle’s seat after installing the car seat with this method. Moving the vehicle’s seat changes the positioning of the lower tethers compromising secure installation.
Einbau auf dem Beifahrersitz
Other installation methods in the front seat
LTA or attachment loops are either pre-installed on the seat rail from your car manufacturer or can be installed using our attachment loops. Read more with our attachment loops guide.
Attach the lower tethers to the LTA by threading the straps through the loops at the base of the seat rail.
If you choose to attach the lower tethers on the front attachment loops of the seat rail, simply attach the lower tether by guiding the metal clip through one of the slots in the strap and route it back up to the back of the car seat. Making sure it attaches securely.
If you choose to use the attachment loops on the back of the seat rail, you attach the lower tethers the same way by guiding the metal clip through one of the slots on the strap but then route the strap underneath the vehicle seat. Just make sure the lower tethers are long enough to reach the metal clip connectors on the back of the baby car seat and that the strap can be properly tightened to secure the car seat in place.
*Important Notice: Do not move the front seat backwards after installation, as this might loosen the lower tethers, compromising security.
Push the lower tethers through the gap between the seat’s backrest and the seat cushion.
Wrap the strap around the hinge of the front seat.
Thread the metal clip through the strap. Pull the lower tether and connect it to the back of the car seat. Pull the strap down to fasten the car seat.
When using this method, make sure the lower tethers are long enough to reach the metal clip connectors on the back of the car seat and that you are able to tighten the strap to secure the car seat. If the lower tethers are too short you may use LTAS to make the installation secure.
Wrap the lower tethers around the vehicle’s seat rail and the floor in the front.
Thread the metal clip through the slot on the strap.
Route the lower tethers up to the back of the car seat, fastening the metal clip to the meta clip connector. Pull down on the loose strap to securely fasten the car seat.
**Important notice: Do not move the seat position after fastening the straps. This could damage the lower tethers.
Wrap both ends of the lower tether underneath the seat rail by pushing the strap around the seat rails connecting points of the floor. For this method the strap should not wrap around the top of the seat rail but underneath and around the bolt or screw connecting the seat rail to the floor.
Thread the metal clip of the lower tether through the slot on the strap tightening it around the base of the seat rail.
Guide the metal clip of the lower tether back up to the metal clip connectors on the back of the car seat and fasten it.
Make sure the car seat is securely fastened by pulling the loose strap of the lower tether down which will tighten the car seat.
***Important Notice: Do not move the vehicle’s seat after installing the car seat with this method. Moving the vehicle’s seat changes the positioning of the lower tethers compromising secure installation.
After installation:
Once the LT or the LTAS are securely in place, gently push the car seat forward and sideways to check for excessive movement. If the seat shifts or moves too much, recheck the installation to ensure it is properly tightened and securely fastened.
Summary
Read the Manual: Before installation, carefully review both your car seat and vehicle manuals. These provide step-by-step instructions specific to your models to ensure a secure fit.
Tighten the Straps: After attaching the straps, pull them firmly to eliminate any slack. The car seat should not move more than an inch in any direction.
Check for Stability: Once installed, gently push the car seat from different angles—side to side and front to back—to confirm it remains securely in place with minimal movement.
Perform Regular Inspections: Periodically check the lower tether strap and anchorage points to ensure they remain secure and in good condition. Replace any worn or damaged parts immediately.
By understanding and properly using lower tethers or LTAS, you’re taking an important step towards ensuring your child’s safety while traveling. At Axkid, we are dedicated to making every ride safer and more secure for your family.
For more information download the BILTapp and search for the required car seat for a 3D guide of the different installations.