0
Cart
-
Car fit guarantee on every model
-
Free deliveries over 100€*
-
365 day returns
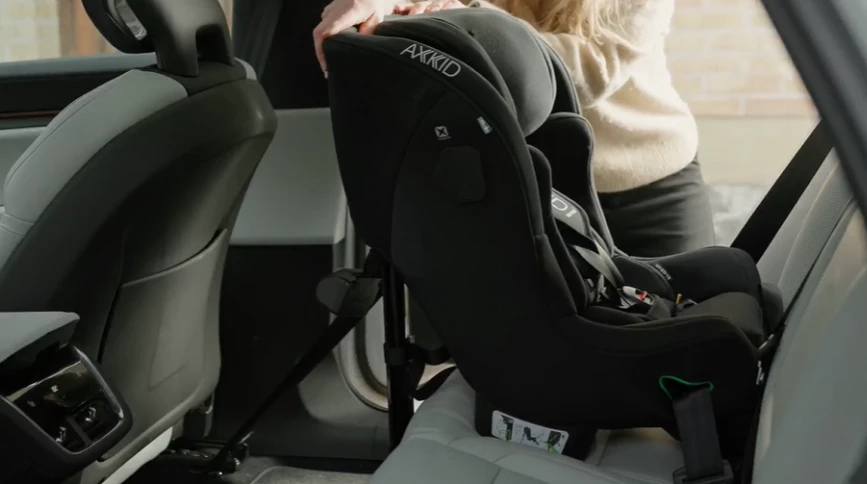
Ensuring a correct and secure installation of your Axkid car seat with lower tethers and retractors is crucial for your child’s safety. This guide will help you understand the correct way to attach your car seat using this lower tether system. Select the appropriate installation method for your needs:
Installation in the back seat: Secure the lower tethers using the pre-installed attachment loops, the included lower tether anchorage straps (LTAS), seat rail wraps, or under-seat rail wraps to ensure a stable and safe setup.
Installation in the front seat: Use the included lower tether anchorage straps (LTAS) to properly secure your car seat by utilizing the front seat hinge, seat rail wrap, or under-seat rail wrap method.
If you have a Minikid 4 Pro or Movekid, click here for the correct installation guide.
Lower tethers with retractors (LT) are engineered to enhance the stability and safety of a child car seat, ensuring a secure and fixed position throughout every journey. In the event of sudden braking or a collision, these tethers minimize movement and reduce impact forces on the child’s head and neck.
LT with retractors are tethers that are attached to the back of the car seat and automatically retract into the lower tether cassette when released.
You can also install attachment loops (lower tether anchorages) on the front seat rail. Learn more about this installation in our attachment loops guide.
(Axkid’s car seats with retractable lower tethers also include lower tether anchorage straps which are separate, detachable lower tethers, which can be installed using the following methods listed below.)
Hinge of the front seat – method*
*Important Notice: Do not move the front seat backwards after installation, as this might loosen the tethers, compromising security.
Seat rail wrap – method**
**Important notice: Do not move the seat position after installing the straps. This could damage the installed tethers.
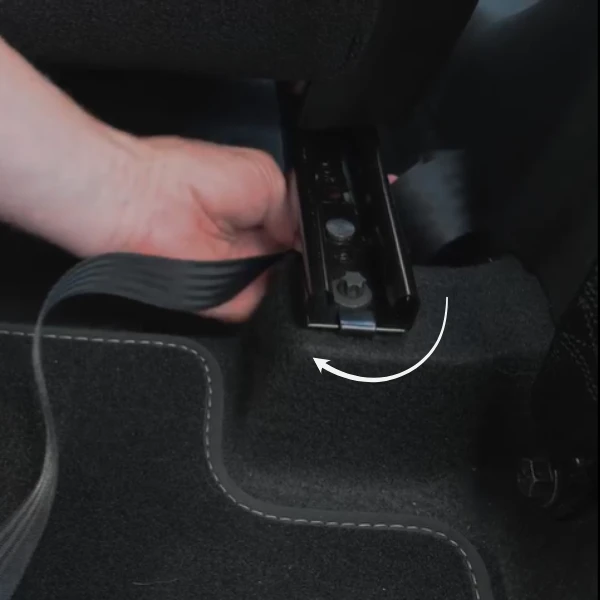
Under seat rail wrap – method***
***Important Notice: This installation method prevents the seat rail from damaging the lower tether strap and allows the front seat to move freely backwards.
*Important Notice: Do not move the front seat backwards after installation, as this might loosen the tethers, compromising security.
**Important notice: Do not move the seat position after installing the straps. This could damage the installed tethers.
***Important Notice: This installation method prevents the seat rail from damaging the lower tether strap and allows the front seat to move freely backwards.
Once the lower tethers with retractor or the LTAS are in place, test the car seat by giving it a gentle push forward and sideways to make sure there is no excessive movement. If the car seat shifts or moves, check the installation again to ensure the car seat is properly tightened and secured.
Review the Manual: Before you start, read both your car seats and the vehicle’s manuals. This will guide you through the specific steps for your models and ensure proper installation.
Eliminate Slack: Once the straps are attached, pull them tight to remove any slack. The car seat should not move more than an inch in any direction when you test it.
Test for Movement: After installing, push the car seat gently from different angles—side to side and front to back—to ensure it doesn’t shift or move more than an inch.
Inspect Regularly: Check the lower tether strap and anchorage points periodically to ensure they’re in good condition and properly adjusted. Replace any worn or damaged parts right away.
By understanding and properly using lower tethers or LTAS, you’re taking an important step towards ensuring your child’s safety while traveling. At Axkid, we are dedicated to making every ride safer and more secure for your family.